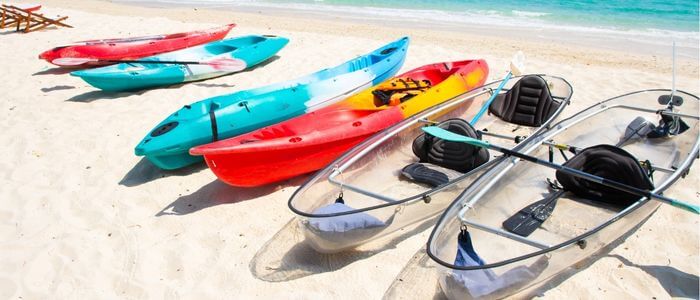
Before someone became the excellent paddler he is now, that person had to master the basics of kayaking. This includes the simple details on how to hold a paddle, ride the boat, and maintain its buoyancy under certain conditions. It might be easy as it seems, but once you’re in for the kayaking trip, it would be a big challenge.
After so many capsizing incidents and falls that you might have experienced from your kayak, you might need to have a quick review of the essentials. Even the veterans have to crack their mental manual when it comes to paddling once in a while. Steering clear of the waters during winter months could actually rust your skills and before you know it, you have a cramping arm due to lack of paddling precision.
This is exactly what this post is about. Here, I’ll give a quick reviewer-or cheat sheet for beginners-for the simple techniques that even veterans had taken time to master. Given that you have a reliable kayak, these points would jumpstart your first or succeeding trips.
Most of the time, you get the image of a kayak floating in the water as you smoothly paddle on the water. But there’s some work to be done before the vessel can finally float on the big drink. First, you have to pull the kayak to the shore until it reaches the water. This could be a bit hard to do if your boat is too heavy or you don’t have the strength to do so (good luck on your paddling!).
Once you reach an almost knee-deep level in the water, stop and place the paddle perpendicular to the kayak. Such level of water is enough for the kayak to float and avoid scraping the hull when you start riding on it. This is the first step, and when you successfully launched the kayak, it’s time to move on the next basics of kayaking.
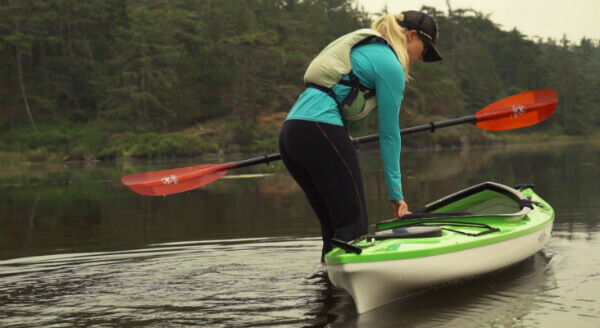
So you’re already set on the knee-deep water, the next thing you should do is to carefully place your bottom on the cockpit with a little support from your legs on the river or seabed. Make sure that you place your oar on the kayak first to avoid dropping it and you have to get out of the boat again to retrieve it.
Once you’re sitting halfway to the cockpit, raise your legs and place it firmly on the footrests or bilge if you’re riding a sit-inside type. It might be harder to ride on a sit-inside kayak as you have to slide yourself on the small opening.
If you already find riding the kayak a piece of cake, you might want to check if you have the same skill in getting out of it. This is actually just a reverse series from riding the boat. However, getting in and out of the kayak would differ if you’re launching from the shore or a dock.
When you’re starting off from a dock, make sure that you place your kayak parallel to it. Swing a leg to keep the kayak from drifting away while you hold firmly on the dock. Slowly place another leg into the boat while you press the vessel on the side of the dock. Your paddle should be placed at the side of the dock with about a quarter of the shaft and blade protruding from the platform for easy retrieval, especially for a higher wharf.
Holding the oar could sometimes be as hard as maintaining your center of gravity. Before you ride a kayak, spend time gripping your paddle so you can have a good feel of it. You can actually practice in a pool so you can simulate the strokes and adjust to the weight of the paddle. If you’re transitioning from a straight shaft paddle to a bent one, you should have a test run on it before hitting a bigger body of water.
Unlike canoe oars, kayak paddles have two blades. The rule of thumb in holding it is maintaining a distance between the hands a bit wider than your shoulder blades. Also, don’t overgrip the shaft or you’ll feel strained easily.
Make sure that the hollow or concave part of the blade is facing you as that part should be dipped into the water for efficient tracking.
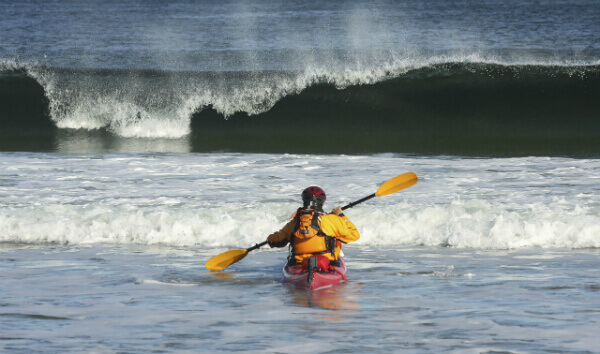
Strong or even mild winds can cause your kayak to drift away. This can happen even if you’re paddling in a certain direction and the wind will continue pushing you away not to mention the waves if you’re on the sea. Learning how to fight the winds takes practice, as you need to learn how to paddle harder and use strokes to have your kayak slice through the water.
If the wind is too strong to deal with, you can install a rudder at the stern of the kayak to help you stay at the right pace.
There are many paddling strokes and basics of kayaking that a kayaker has to learn to go the distance. Some paddlers would tell you that it only takes a handful while others would insist that you master a dozen to be an excellent sailor. This depends on the condition of the waters you’re paddling in. But for a reference, here are some of the strokes in a nutshell:
This is the most common stroke that a paddler does and even beginners can actually perform it. However, it may take a good amount of time to be used to it. Once the swing of the blade reaches the back of your hip, lift the paddle and do it alternately on the other side of the boat.
If you want to take a step back, you just have to perform a reverse forward stroke. You start by dipping the blade on the water beside your hips then gliding it forward until it almost reaches your feet.
Now that know how to move forward and backward, you should master the sweep stroke to turn your boat. The sweep stroke is an exaggerated version of the forward stroke where you glide the blade in the water from your feet up to the farthest that you can reach on the back of the kayak. Doing repetitive sweep strokes at the same side of the kayak would turn the vessel quickly.
If your arm movement is limited, you can try performing repetitive forward strokes to turn your kayak. However, this would take a while compared to turning the boat with sweep strokes. Still, it’s one of the basics of kayaking you can make use of.
In case you topple on the water while tucked in a sit-inside kayak, you should know how to do an Eskimo roll. This is actually hard to master but if you happen to do it effortlessly, you’re up for a safer trip. The roll requires you to perform a 360-degree turn underwater to regain your floating condition.
The paddler would let the kayak capsize with him on it while he maneuvers the boat to be on the upside position. This requires hip strength as the kayaker would have to use the lower and upper body to correct the vessel’s position. Meanwhile, the paddle should be positioned perpendicular to the boat to avoid flailing it and hurting the paddler.
One thing you should remember when doing an Eskimo roll is to have an available spray skirt or bilge pump. This is to ward off the water that may sink the boat.
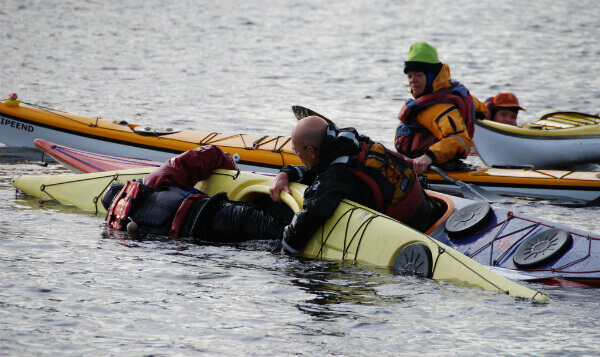
Of all the basics of kayaking you should master, the most important is self-rescue. This is crucial especially if you prefer paddling alone (which is a no-no!) and you happen to lose your balance and the kayak capsizes.
Start by exiting the kayak. This is easy to do if you’re on a sit-on-top type, but if you’re tucked on the sit-inside, you might as well master the Eskimo roll. Anyway, once you’re free on the water, place your kayak on the correct position and put yourself in the middle of it. Hold onto the deck line and let your extremities float into the water so you can make a T-shape with your body and the kayak. Push the kayak downward while your legs produce a strong kick to re-enter the boat.
If you find it hard to perform the first method, try the ladder self-rescue. This would need you to get off the kayak, get into the stern, and straddle it. Once your legs are spread as if you’re riding a horse, slowly climb your way back to the cockpit. This is easier to do if you capsized in the middle of the sea.
Make sure that you also have the bilge pump working as the process may cause the water to enter the cockpit.
Tandem kayaking is a good option for families who want to have weekends on the water. But this could actually be harder than paddling on your own. Coordination is needed, and if the other kayaker isn’t skilled on this, the boat will go nowhere.
The rule of thumb here is that the front paddler should set the rhythm and the back paddler should only follow suit. This is to avoid the kayak from zig-zagging on the water. The front kayaker should paddle freely while the one on the rear should mimic the pattern. However, avoid smacking the front paddler with the oars.
Communication is necessary to make tandem paddling work for the both of you. Therefore, it’s not a good idea to tag your angry spouse on the trip as this would only become a competitive case of endless, directionless steering.\
Hazard checking is the number one rule before riding a kayak. No matter how skilled you are, large waves, rainfall, and strong winds could send your boat sinking and you lost in the middle of the sea. Avoid places with harsh weather and strong current, especially if you’re going alone.
If the weather and water are warm, go for a sit-on-top kayak as jumping into a sit-inside would be dehydrating and uncomfortable as ever.
Another thing that you should remember is to dress for a possible capsizing. This includes a wetsuit in case the water is colder than 60F.
These basics of kayaking are staples even for veteran paddlers. It doesn’t hurt to review your skills once in a while so you can ensure that you’re always on top of your paddling game. Paired with the right equipment and the knowledge to use it, you can make your trips worthwhile. Do you have more reminders to add here? Let us know in the comment section below!

Hey there kayak lovers! I’m Jay Schwartz, the author here at Kayak Guidance! You know water sports – you know me! My life is all about it. Kayaking, Paddleboarding, Fishing, Snorkeling and so much more. I love to share my passion and knowledge with all of you.

Hey there kayak lovers! I’m Jay Schwartz, the author here at Kayak Guidance! You know water sports – you know me! My life is all about it. Kayaking, Paddleboarding, Fishing, Snorkeling and so much more. I love to share my passion and knowledge with all of you.

Welcome to KayakGuidance.com! If you’re looking to have some fun outdoor water adventures, then you have come to the right place. We help our readers find the best kayaks and water related equipment to help you have the best time of your life whenever you are engaging in water activities.
This site is a participant in the Amazon services LLC associates program, an affiliate advertising program designed to provide a means for sites to earn advertising fees by advertising and linking to Amazon.com.